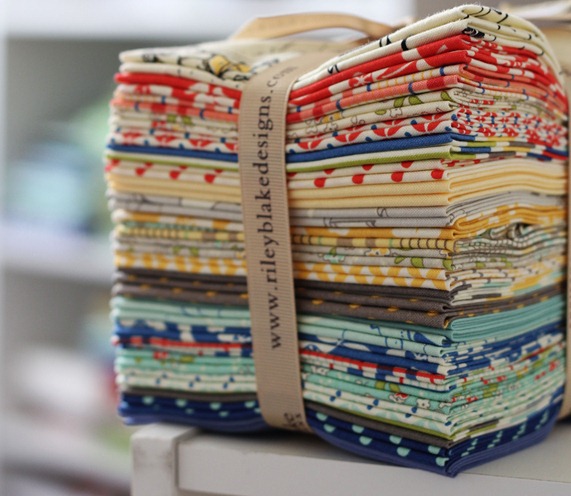
This is a great quilt for a beginner who wants to tackle something big…and a good way to use a fat quarter bundle that’s collecting dust (wouldn’t we all love that problem?!).
You can now find a printable version of this free quilt tutorial at the link below. Enjoy!!
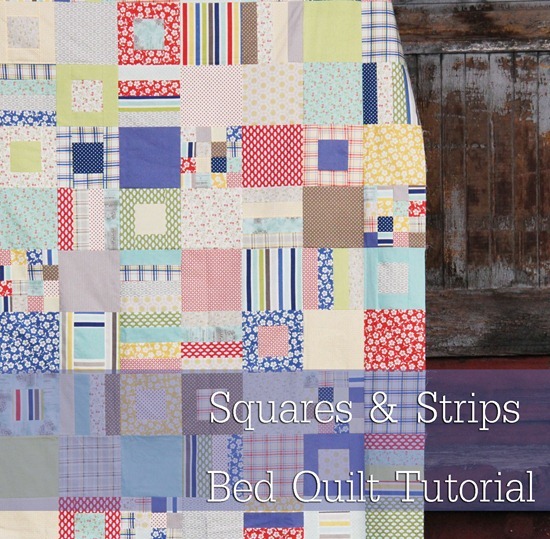
Strips and Squares Bed Quilt Tutorial
* The blocks are all 8" finished (8 ½" unfinished).
* Each fat quarter will make 4 + ⅓ blocks. Each ¼ yard will make 4 + ¼ blocks. So if you know the number of blocks you want…divide that by 4.3 or 4.25, and that’s how many fat quarters or ¼ yards you’ll need.
* The table below is a guideline…measure your mattress to make sure what size you’ll need. Remember that a large quilt can shrink as much as 4" in each direction depending on the batting.
|
Size
|
# of Blocks
|
# of Fat Quarters
|
OR # of ¼ yards
|
|
|
Throw
|
56" x 64"
|
56
|
13
|
14
|
|
Twin
|
64" x 88"
|
88
|
20
|
21
|
|
Queen
|
88" x 96"
|
132
|
30
|
32
|
|
King
|
104" x 96"
|
156
|
36
|
37
|
1. If you’re using fat quarters… download and print the cutting diagrams HERE.
If you’re using ¼ yards…download and print the cutting diagrams HERE.
Be aware there is VERY little waste if you use fat quarters. This is ALL of my scraps from 3 fat quarters:
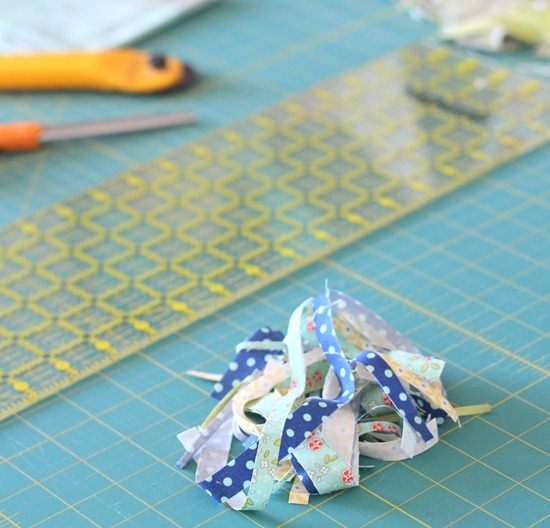
No wasting fabric here! Once your comfortable cutting, stack 2 fat quarters or ¼ yards and cut at the same time. If your FQ’s are wonky and you’re short a strip or 2…just substitute it for something else…no one will know. ;)
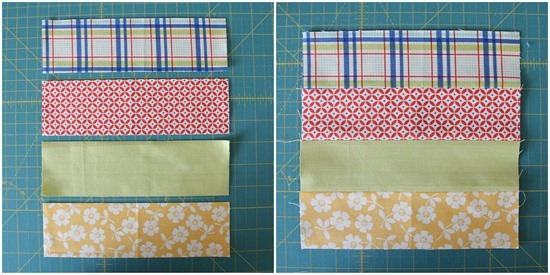
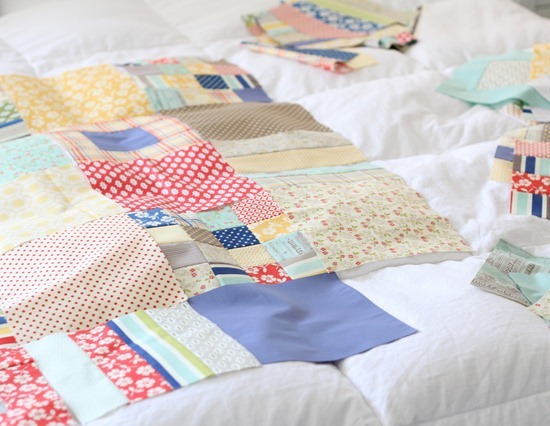
2. Choose a 4 ½" square and sew a 2 ½" x 4 ½" strip from a different fabric onto each side of the square. Press out. Repeat with a 2 ½" x 8 ½" strip on the top and bottom. Press out. Repeat until all of these pieces are gone. You’ll have 1 of these blocks for each fat quarter or ¼ yard you cut.

3. Sew the remaining 2 ½" x 8 ½" strips into sets of 4 until they are gone. I like to press my seams open.
4. Sew the 2 ½" squares together into 16 patch blocks. Sew the squares into rows of 4 first and press, alternating the pressing direction for each row (or press seams open). Sew the rows together to make a block and repeat until the squares are gone.

There aren’t many of these blocks…but if you want more variety in your quilt you can always make some more with scrap squares!
5. The rest of your blocks will be your plain 8 ½" squares.
6. Layout the blocks randomly:
|
# of Blocks per Row
|
# of Rows
|
|
|
Throw
|
7
|
8
|
|
Twin
|
8
|
11
|
|
Queen
|
11
|
12
|
|
King
|
13
|
12
|
6. Sew the blocks into rows and press, alternating pressing directions with each row. Sew the rows together and press.
* When sewing together a large quilt like this, I sew the blocks together into sections. I layout and sew one quadrant at a time, then sew the 4 quadrants together to make the large quilt top. It’s like making 4 mini quilts and sewing them together to make the large quilt…and its much easier to handle under my sewing machine.
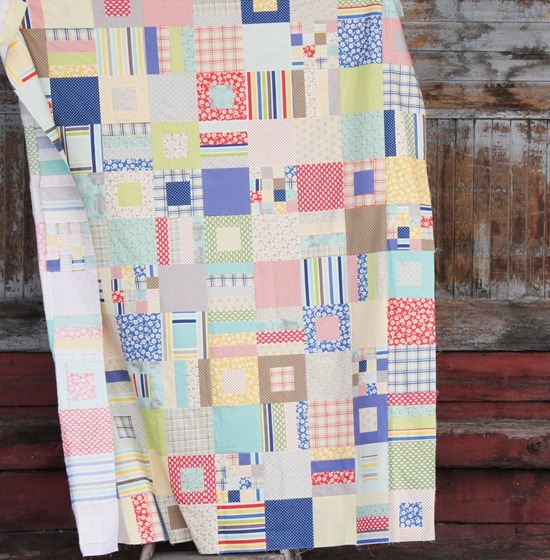
* My fabric is Seaside by Riley Blake Designs, and Vintage Modern (the red, green, and grey rectangles) by Moda. Which is why I called it my Seaside quilt for those of you that asked…no one said I was good at naming quilts!
Happy Quilting!
SoozeM
Well what you may lack in naming quilts (not saying that you do BTW!) you certainly make up for in designing them, this is gorgeous (and I like the name, it suits it!).
stellamaria
thank you for the tutorial ! i like this quilt very much !
greetings from germany
stella
Melanie
Fabulous quilt! I have lots of fat quarters to use up :)
Leigh Walter
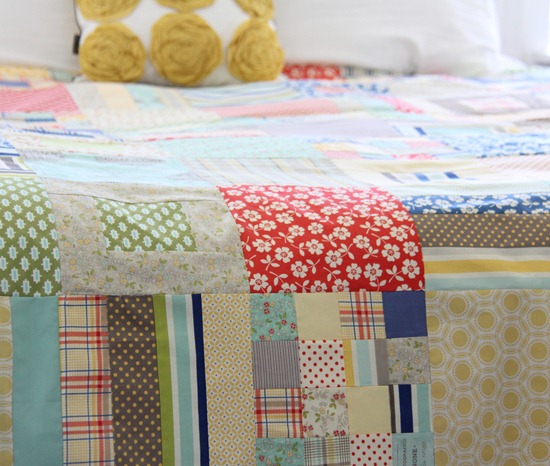
Oh Allison this is beautiful!! Just a question, in photo of the whole quilt top, bottom row, second in from the right, have you joined 2.5 x 8.5 strips together for that one, or is that a 8.5 x 8.5 block that just happens to be stripey? I've read the tutorial twice but might be missing something (it is early here!) Very excited to try this one out! Thanks, Leigh
Carla
Hello Allison.
First of all absolutely love this quilt. Congratulations!!
I have linked this post in my blog, because I really liked it. Please let me know if you don't mind, if you do I will take it out
Thank You for yet another idea, if I didin't have enough already ;-)
Have a great day
Carla
Judith Blinkenberg
Oh Thank you so much. Now I know what to buy. (I have many fat quarter bundles i need to use, older lines) You are a super person you know!
Shawn
Thank you Alison and I love Seaside and your creative quilts!!!
Carol
What a very fun quilt...Love it! Thank you for sharing it with us!
Gene Black
Wow thanks for such an easy but fun quilt design. I did download the cutting directions for FQs as I need to use some of mine. (it seems I prefer to "save" them) LOL. Maybe I can whip up one of these beauties from some of them.
Karen H
Thanks for the tutorial! I have added it to my list of projects I want to try! :)
piece peace
I have a Halloween themed FQ bundle that I adore, but I had not found the right use for them until now. Thank you so much.
Vickie @ Ranger 911
I just love all the projects you feature! I AM going to tackle a quilt one of these days. But right now, I'm going to take a look at all your previous posts. :@
Katie Fleming
I love this quilt! Thanks for posting the directions!!!
- Katie Fleming
Kate Michelle Designs
Julie
I love it! Especially all of the size variations! Would this work well with fat 1/8ths too? I have a bunch of those lying around. If not could you shoot me some other ideas that might? Thanks so much!
Debby/Darthy
This is beautiful. I can't say thank you enough for the hard work you've put into this tutorial. I'm sure I speak for many quilters when I say how much you are appreciated. Thank you.
Jess
I am so glad that you made a tutorial for this quilt. I loved this quilt when you posted a picture of it. Thanks so much.
Jill S.
I love every single quilt you design! Your style is amazing, I own several of your patterns, plus I've made your zig zag quilt, your double hourglass,the disappearing 9 patch, your kaleiscope,the shortcake and the bizzy kid (3 times now). Now I WILL be making the seaside!! Seriously, I LOVE you STUFF!! Thank you for your amazing patterns and tutorials!
Kathy
Thank you for the directions. I had to write down your stuff as I don't have my printer with me but well worth the time. I can't wait to make it.
The Baldwin Family
Thanks for the freebie!! Printing it out now to add to my ever growing "to do" list.
allison
Some of the blocks are Striped fabrics....so they look like strip blocks but are just Stripes. I placed some of my strip blocks next to each other to add some interest to make long sections of strips!
Goddess in Progress
I ADORE this. Bookmarking it, for sure. In fact, I'm teaching a friend how to quilt this summer, and we might just have to use this tutorial!
EG
This is great - so sweet and homey! Thanks for the tute!
Betsy Lynn
You are such a sweetie for giving us this tutorial! It's a fabulous quilt and is now on my to-do list!
Becca
Thank you for the tutorial...this looks fun! I've had a set of fat quarters collecting dust for, oh, 6 years? It might just get cut into!
Stefanie
So I saw the quilt.
Thought, "I'd like to do that one"
And there you go challenging me higher,
it rocks!
Krista Hansen
Beautiful! Love it!
Holly
Brilliant!
Patti
Gorgeous just love it. Thanks so much.
ancee
Thank you lovely lady for this wonderful tutorial. It was so kind of you to share w/ great pictures & explanations....& all for free!
You & your blog are greatly appreciated by me!
Fondly, Nancy
Kristin
Wow! this is great!
domesticduck
Thank you for the tutorial, this is just what I was lookin for to get started on my first quilt!
db2dc534-c1f8-11e1-b9b3-000bcdcb2996
Allison, I too, am loving your quilt and your hard work on the tutorial.....thank you soooo much! You mentioned about the shrinkage of quilts....."depending on the batting"..
Is there a batting that shrinks less than others??? Thanks
allison
A 100% Cotton batting will shrink more than a 80/20 or polyester batting...it usually says on the package how much shrinkage to expect.
Deanne
Great quilt design. I really like the lack of scraps left over!
Carole M
keeping this one for later! I actually do have a fat quarter bundle laying in wait...
Sheila
Thank you for a great tutorial and fun pattern. I actually have a weakness for fat quarters and have a lot! Looking forward to trying this one :)
trish
This is awesome Allison! Seriously. I am doing this next! :o) I have a layer cake of Millie's Closet just waiting to be played with and this is the perfect pattern! My quilt will turn out a wee bit smaller, but I plan to add a border around it. :o)
Thanks so much for the tutorial. :o)
Have a great weekend. Trish
Peggy
Oh I am so excited as I have fat quarters, layer cakes, and miscellaneous yardage which is sitting pretty, gathering dust! I know exactly what to use it for now... this quilt... as a belated baby gift. (yeah she is now a little over 2 years old... oops!)
Once again thank you so very much for sharing your expertise with us! I learn so much from you!!
jodi@Pleasant-Home
Love everything about this Allison!
toots2u
this is fabulous and i really appreciate the tutorial! thank you so much!!
SewingSophia
Thank you so much for sharing this turorial!! Great to use all scraps of fabric!! Nothing goes to waste!!
The Church Family
Stunning!!! If only I could quilt... :) Blessings!
Taylor @ That's Sew Taylor! :)
miki
I love all of your quilts and have purchased some of your patterns. Thanks for this one.
Question: When I click on the cutting layout links it takes me to the Google Drive homepage and not to a specific file. Can you help? Thanks!
Jess
What a beautiful quilt top! Thank you so much for the tutorial. I can't wait to make one for myself. I love that red floral print!
Aunt Spicy
A-totally love this quilt...it is a cheery, breezy summer quilt, perfect name for it as well!
Chris {frecklemama}
This isn't a tutorial, it's a free Cluck Cluck Sew pattern! So generous of you to share it with us. I love that you provide size options. I know it takes more time and effort, so pls know how appreciated it is!
Jude
love this quilt and will put it on my to do list
Mermaid Sews
Thank you so much for this, I love this quilt sooo much.
Di
Thank you for such a great tutorial. I have started making a quilt with a jelly roll , charm pack and a couple of FQ. I don't know how it will turn out but it is a lovely pattern. Thank you. Di x
EG
Have you quilted this one? I made 2 (crib-sized or so) and I can't decide how to quilt them.
Augustsnow
This is wonderful. but your cutting instruction links no longer work. :( I would love to get get them since I have several fat quarter bundles awaiting an adventure.
Caleighs_Mom
I am trying to get the cutting instructions - but the links aren't working. Can you help me - I was really excited about making this quilt.
Thank you!!
Andrea Turner
Thanks for this tutorial! I'm working on a quilt from it right now.
Debbie
I love this quilt and the tutorial. Making this as a Linus project Friday, at FatQuarters quilt shop in Vista, California. Thank you for the great directions.
Jan Griggs
Thank u so much for all your tutiorals u make beautiful quilts. the question i have is this, when I went to download the instructions for fat quarters it takes me to google drive how in the world do I find the instructions? thank u !! Jan
Ruth S.
You have me inspired! Thanks for sharing.
...I am Nora.....
Gosh! It's fab....but you're 2 days too late!!!!!!!
I sat up for hours the other night working out how many blocks I would get out of my Seaside bundle to make the pinwheel quilt from Moda Bakeshop into a larger throw for my caravan!!! If only I'd curbed the enthusiasm and waited!
But my gosh what an inspiration to get going on it....not sure about the quilting bit though! :/
Thanks for sharing it's great for novices like me!
Nita
Beautiful! and perfect for those fat quarter bundles I've got hanging around! Thank you very much!
Kjersten
Beautiful quilt. Thanks for the tutorial. I am excited to use it for a fat quarter bundle I have had around for a long time. It's perfect!
Jo Robertson jorobexeter(at)gmail(dot)com
I'm making this quilt at the moment - what did you choose for the binding? the photos on the blog show it unbound. I'm scratching my head over what to choose from the different seaside fabrics. I would have gone for one of the darker blues but I have the pale turquoise flower print for my backing.
Cat from Raspberry Rainbow
Thank you for this amazing pattern - I am making one right now. It is coming together really quickly, and I am so in love with it. I am sure this wont be the only one I make :)
Lynn
I'm so excited to begin this quilt for my son's new bed! I'm using Riley Blake's One for the Boys but only chose 5 of the prints from the collection. I'll probably sprinkle in one or two coordinating solids but should I try to use more than 7 prints or would that be enough?
Thanks for the tutorial. I can't wait to get started!
allison
Lynn I think you'd be fine with 7 prints if you mix in solids that match...if you don't it might be tricky to layout blocks without the same fabrics touching!
Emily Ziegenfus
I absolutely love this quilt. Do you think that 40 fat eights would be enough to make this quilt?
allison
Hi Emily! It should work...it might just take some figuring out on the cutting diagrams to make it work!
Serafina K
I was just wondering how many different colours you used for this quilt? I know that I need 32 1/4 yards but I feel like 32 different colours could be a little chaotic!
allison
I'm not sure off the top of my head how many there were Serafina...I would say maybe 8-10 different colors in different prints? It was so long ago I don't remember exactly, I used a fat quarter bundle to make it. Hope that helps! -Allison
Serafina K
I ended up picking eight, thank you :)
leXi
I'm using scraps and wanted to know how many of each style block would I need for a queen sized quilt, can you help me?
Shannon Whitehill
So lovely! Adding this to my to do list... planning to make the throw sized using August from Cotton + Steel
Nanna Liz
I have a lot of Kanvas Cabana II nautical fabric and I've been letting them stew until I found the right pattern for them. This is it! I make Quilts of Valor almost exclusively and it will be going to someone in the Navy or Marines. I'm just going to put a border on the throw size to make it a little bigger. Thank you!
Maddie
This quilt is so beyond beautiful. I have never made one so amazing in my life. Thank you so so so much.
Carole Lloyd
Thank you so much for your beautiful site. I love your work and I wanted to start making my first full sized quilt by learning a new square a week. You have really helped me by helping me start by work out the materials I need. Thank you for being so generous in sharing for free. What an inspiration you are.
Vicky
I love this! Is there any way I can get a copy of the pattern for 1/4 yards? It's not letting me download it.
Thank you!
Lora Carver
It’s now May of 2019... and I finally finished this quilt! A few years late but it’s such a nice pattern!
Allison
LOL love it! At least you finished!
Charlotte Gurling
hi what is meant with "FAT" in the sentence of fat square
Ann
I have the sewn squares that are 8 inch and the strips that are 8 and 8.5 inch and the straight squares that are 8.5 inch. Does this mean I have to trim to make the same size? Or did I cut wrong.
Valerie
Hi there! On your download cutting instructions there are a bunch of 2 1/2 inch squares to cut out. I don’t see that in your pattern here. Was that more of an after thing to make a different square? I’m going nuts trying to figure out what I’m missing. Thank you!